Like most people who do creative things (is there anyway to not make that opening sound pretentious…?) Pinterest has become my go-to destination to look for a little inspiration. I mean, hello, isn’t that what the site is for? Actually, I have no idea what the site’s real primary function is – that’s just what I use it for.

Showing posts with label tutorial. Show all posts
Showing posts with label tutorial. Show all posts
Friday, October 24, 2014


Tuesday, October 15, 2013
Our Life in Crafts–October Pt. 1

In case you were unaware – Bella is a crafting fiend. No really. The girl absolutely loves to get her craft on. I decided that once or twice a month I would post and share our crafts that we have done each moth, along with some very basic steps on how you can do them as well. A lot of them are pretty basic and can be done with stuff you already have around the house, and some I got from Pinterest. Now, they aren’t all Halloween (or even fall) themed, but most are, and the others could probably be mixed up some to make them fall themed.

Monday, October 7, 2013
Project Life pages with an art journal twist.
How ironic. I take time off from the blog to relax and give some thought into reorganizing it and planning more for it and what is the first thing I do in my return… a post that doesn’t go with the calendar I mapped out. (Yesterday’s Edit like this…. doesn’t count since it was planned a bit back and scheduled.) Of course, you the reader, don’t know the new schedule of posts, so I’m just ratting myself out, but I just thought it was a funny tidbit to share.

I’m part of a digital Project Life group on Facebook and a question was asked about how to create Project Life pages that had a strong art journal feel, but were still noticeably Project Life. The question was asked with this page linked as an example: mumkaa_’s Project Life::week11 on Flickr. Now, I don’t necessarily consider myself to be an expert on Project Life or art journal pages, but I am really good with messy pages. If you’ve ever seen my Project Life spreads you’re probably aware that they are very simple with more of a focus on photos and journaling and color, the pages generally don’t have a ton of extra stuff on them. However, if you’ve ever followed my regular scrapbooking pages you would know that messy pages and I go way back.
Wednesday, July 31, 2013
That digital washi tape tutorial
I know, I promised it like a week ago, but then, you know, life happened. It just has the habit of doing that you know.
Anyway, enjoy!
Tuesday, July 2, 2013
We’re going to grow some veggies.

Last year we went all out and bought the Jiffy Professional Greenhouse Kit and planted pumpkins, squash, okra, carrots, and um, something else. We got all organic seeds and the big boys and I spent an evening getting it all set up. Then we babied it, and watched it, and watered it, and followed the directions to a tee.
Then we noticed the only thing that survived and prospered to planting time was the squash and pumpkins. But that was fine – we could live with that. Then we got these nasty black caterpillars that came and ate all our poor baby plants. To put it mildly, we weren’t too happy with how our little foray into gardening went, and it just reminded us why the only plants we have are our hardy bushes and azaleas out in our front bed.
A few weeks ago Bella found some seed packets that somehow ended up in one of the drawers in the kids’ dresser and ever since she has been begging us to plant them and make a vegetable garden. It’s all the girl talked about for days and days. But we really didn’t want to spend a ton of money on it again in case those nasty caterpillars came back. We had just finished a large container of eggs and it just so happened to be a biodegradable container – so we picked up some dirt this weekend and decided to plant us some veggies.
Wednesday, November 14, 2012
Not that Wordless Wednesday
Photo editing with me style.
Original – What can I say… I love me some sunburst back-lit pictures.

Here is the original next to the final version, and then, it next to the final black and white version.


Now… let’s get to step showing.
1. Open a curves layer and edit first going to your red channel, then green, then blue. Once those are done go to RGB channel and select the black line and do any more tweaking you wish.

2. Take that layer and change the blend mode to soft light at 70% opacity.

3. Create a gradient layer going at a diagonal of about –30 degrees. Make your firs color a dark brown and your second a good strong orange. Turn the brown’s opacity down to about 25%.

4. Turn your gradient layer’s blend mode to linear burn with an opacity of about 20%.

5. Do a slight bump to both your brightness and contrast.

6. Create an exposure layer. Nudge your Offset and Gamma Correction until you get just a touch of a hazy effect to your photo.

7. Duplicate your background and select all your editing layers. Merge. Then if you want run a noise corrector. I ran Noiseware and used the Landscape preset.

(I know mine looks like I skipped the last step…. I didn’t. *sigh* I’ll explain at the end why some things don’t look the same from one step to another in layer set up…)
8. Duplicate your merged layer and go to Smart Sharpen. I increased it until details were crisp and mostly overlooked any noise being added, that will be taken care of next.

9. On your sharpness layer create a mid-dark gray layer mask then take a soft white brush and go over things you want to bring more detail to. I went around the edges of her, the stitch detail on her shirt, her features, and the camera. And that’s it for this part!


Now… the black and white conversion.
10. Change your image mode to Grayscale.

11. Then go and change it again to Duotone. Pick your colors (even if you just use black and white… or a very dreamy pink and purple, lol…. or a classy super dark brown and pale pale cream) then click on the curves for each and adjust until your happy.


Now… I can’t tell you how many times I almost gave up on this post!!! Photoshop was literally crashing every other blessed step. But I trudged on, saving a TIFF of both my working image and of my screen shots so that I could post.
Tuesday, August 21, 2012
Easy Not-So-Bland Chicken & Gravy
This is actually my grandmother’s recipe – before you go and start thinking I came up with it.
Yummm.

This is a simple, yet very yummy and not bland, recipe for making chicken and gravy in the crockpot and it takes literally 5 minutes to prepare.
Ingredients:
- 4 boneless skinless chicken breasts
- 1 can chicken gravy
- 1 can cream of chicken soup
- 1/2 cup of water
- 1 teaspoon ground black pepper
- 1 teaspoon onion powder
- 1/2 teaspoon rosemary
- 1/2 teaspoon thyme
- 1/2 teaspoon garlic powder
Directions:
- Combine everything except chicken in a small bowl (or in a 4 cup measuring cup if you’re like me).
- Pour half of mixture in crockpot.
- Add chicken.
- Pour other half on top of crockpot.
- Cook until chicken is done (low 6 hours, high 3 hours)
See. So simple, and so much more flavorful than the usual chicken and gravy that uses canned stuff for the gravy. And it is so easy. I didn’t even completely thaw out my chicken for it. I just grabbed my whole bag of chicken out of the freezer and threw it in the fridge over night, so everything was still half frozen.
And…
Yesterday we got in a new package of diapers from a good longtime friend from JustMommies. We now have a very modest and respectable little diaper stash going.

Saturday, May 26, 2012
Fixing Wrinkly Backgrounds

So I’m going to show you the very simple steps I did to take my photo of Mason from this
to this


Now, I’m not covering all the editing steps in depth, just how to clean up the background. Before I started cleaning up the background I went ahead and did all my regular editing so that my photo is now at this

First, I’m going to duplicate my image and apply a guassiaun blur to the duplicate. You want a pretty good strong blur. I used a blur radius of 30.

Next I’m going to add a layer mask and black out Mason.

Then I took a light gray brush and went around the outline of him to soften the change from blur to focus some.

After that I’m going to use my color dropper and select the primary color of my background and fill a blank layer with it.

Create a layer mask on that layer and switch the layer mask color from white to black. (Your picture should now show back up and the solid color should vanish) Take a medium gray brush and start brushing over the wrinkles.
Take the gray lighter and lighter to cover stronger shadows until you end up with a mostly smooth background.

Of course you could take it further and completely smooth out the background, but I like to leave it with some texture left to it. Also if, like me, you used a background with texture (that isn’t just wrinkles lol) on it and you want some of that to show up either hide the gaussian blur layer or play with its opacity. For example here’s my finished picture with the guassian layer at 50%

Well, I hope you enjoyed this and found it helpful.
Thursday, March 8, 2012
Tutorial Number One

First off, these pictures show you about how the original looked. You know, just in case you wanted to know.
Note – I’m using Photoshop CS 3, and other than the first two steps (which you can’t really create layers with) I use adjustment layers not image adjustments. That makes the edits easily tweakable.
The first two steps use filters and can be done in any order. If you chose not to do them that’s fine. I actually usually add these last if needed to be honest, but their effects actually do show a big part in *MY* photos edits.
Go to Filter>Render>Lens Flare.
I placed it between the top corner and the top of Zach’s head. His hair was already sort of washed out right there since that’s where the light was coming in from. I used the 50-300mm Zoom effect and set the brightness up to 150.

Next, go to Filter>Distort>Lens Correction.
Since I’m working with a white sky, and going for a heavily edited vintage look, I use a go-big-or-go-home mentality on this part. I set my vignette high – not something I recommend doing for just regular edits. I set my amount on the vignette for –35.

And here’s where we switch to adjustment layers.
Use an adjustment layer Gradient Map.
Change your two gradient colors to a deep brown (3b2107) for your darks and a light gray (d3cfcd) for your lights. Once you’ve done that change your blending mode on the gradient map to Soft Light and set the opacity to 30%.

Then use another adjustment layer Gradient Map.
Only this time we’ll be using *three* colors. First set your darks to a dark blue – but not so dark it looks black (0c114f). Then half way on the bottom between your dark and light add another marker by clicking and select a deep orange (d55c2e). For your lights go with a light creamy orange (fde5dc). Then change the layer’s blending mode to Soft Light at an opacity of 60%.

and now the last step is…
Add a Fill Layer>Gradient to your picture.
If it doesn’t automatically do it, first select a gradient that goes from 100% visibility to 0% visibility. Then change your color you see to a light tan (ede1c8) and then the color you don’t see to a deep red (cd291c). Then set the blending mode to Soft Light – no need to adjust opacity.

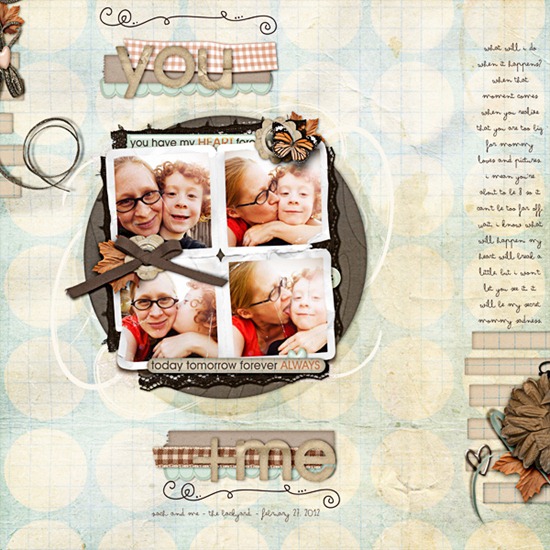
And we’re done! I used this exact edit on my series of photos in this layout:
Subscribe to:
Posts (Atom)